
Ever wondered if you can recreate a steakhouse favorite at home and beat the takeout in taste and cost?
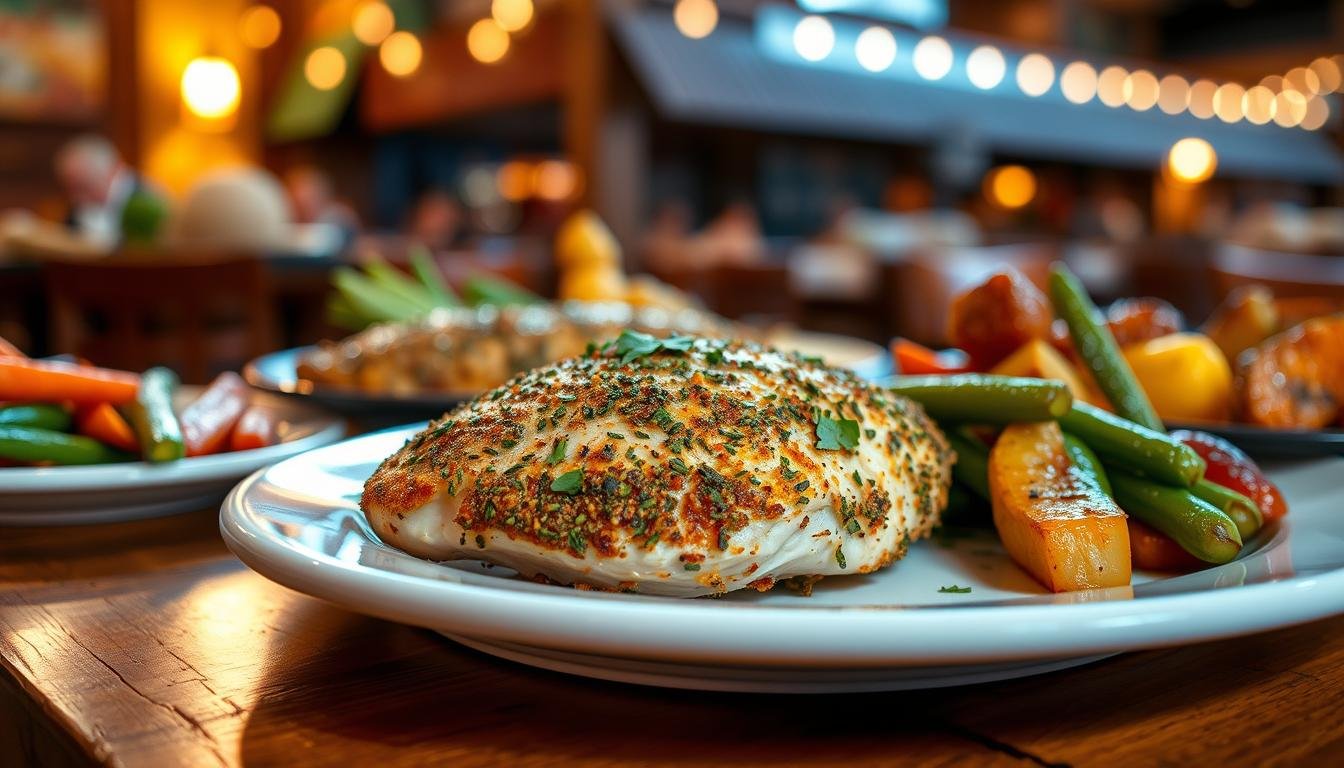
I love making the iconic herb crusted chicken texas roadhouse dish in my kitchen. It brings restaurant-quality flavor to weeknight dinners without the crowd or the bill.
This easy recipe shows how to get a crispy exterior and a tender inside in just a few minutes. I tested the roadhouse herb method until it matched the flavor I remember from the menu.
Follow my clear steps and you’ll have a flavorful main course that’s healthier and more budget-friendly than dining out. I walk you through timing, seasoning, and simple techniques so your crusted chicken turns out perfect every time.
Key Takeaways
- I recreate a famous restaurant dish at home with easy steps.
- The method yields a crispy exterior and juicy interior every time.
- You can prepare this recipe in minutes for busy weeknights.
- It’s a healthier, budget-friendly alternative to dining out.
- My tips capture the authentic roadhouse herb crusted flavor.
Why I Love This Herb Crusted Chicken Texas Roadhouse Recipe
I keep this version in regular rotation because it delivers big flavor with little fuss. I’ve been a fan of the texas roadhouse menu for years, and turning that restaurant favorite into a simple copycat recipe made weeknights much better.
Making these chicken breasts at home is quick and fun. The method trims prep time but still builds a tasty crust that rivals the original.
What sold me was how easy it is compared to other copycat approaches. It’s forgiving for new cooks and flexible enough for seasoned cooks who want a fast, reliable main.
- Family-friendly: we eat at home most nights, so this recipe is a staple.
- Budget smart: you get restaurant-quality taste without the bill.
- Consistent results: the seasoning blend helps the breasts brown evenly every time.
Essential Ingredients for Your Kitchen

A few quality ingredients turn a simple skillet meal into something memorable. I keep this list short so the recipe stays quick to pull together on busy nights.
Dried Herb Selection
Choose dried dill, oregano, and basil for a balanced, savory profile. Add garlic powder and paprika for warmth and depth. Season with salt and black pepper so the crust and interior taste layered and bright.
Quality Olive Oil
I always use good olive oil to help the herb mix adhere and to promote even browning in the skillet over medium-high heat. The oil delivers fat that carries flavor and helps the lemon finish pop.
- To make this herb crusted chicken, keep dried dill, oregano, basil, garlic powder, paprika, salt, and pepper on hand.
- A fresh lemon brightens the dish and balances the fat in the crust.
- A large skillet is important to cook breasts evenly without crowding.
- Serve with simple sides for a complete meal the family will enjoy.
Preparing the Chicken Breasts

I begin every batch by evening out the thickness of each breast so cooking is predictable. This step makes a big difference in final texture and helps the herb crusted coating adhere evenly.
Tenderizing and Butterflying
Butterflying the skinless chicken breasts creates two thinner pieces from one. I slice almost through, open the breast, and press it flat. This lets each piece cook in just a few minutes without overcooking the edges.
I use a meat mallet to gently tenderize the meat. Pounding evens the thickness and softens fibers so the breasts stay juicy.
- I always pat the pieces dry so the coating sticks properly.
- Flattening controls cooking time and prevents a dry center.
- These small prep steps yield a professional texture for every breast.
Spend a little extra time here and the cooking results will reward you. The method makes the meat tender, seasoning consistent, and the final dish feel like a restaurant-quality recipe.
Creating the Perfect Herb Blend
A tight mix of dried herbs, garlic powder, paprika, salt, and pepper gives the dish its unmistakable personality. I combine measured amounts in a small bowl so every batch tastes the same.
This step defines the copycat recipe. I focus on quality spices and mix them thoroughly before touching the meat so the coating clings evenly.
I coat each piece generously, pressing the mixture into the surface until every inch is covered. This is how the roadhouse herb crusted flavor forms and turns simple meat into a restaurant-quality plate.
“A balanced dry rub makes the difference between bland and bold.”
- I use garlic powder and paprika for warmth and depth.
- Salt and pepper are adjusted to taste; a light hand keeps the base true.
- Mix herbs well so the crust browns and stays crisp when it hits the pan.
Mastering the Skillet Cooking Technique

Control of temperature and choice of pan dictate how the coating browns and the meat stays juicy. I focus on simple steps that keep the process reliable and repeatable.
Heat Management
Maintain medium-high heat so the surface sears in about 5 minutes per side and the interior finishes tender. Watch the aroma; spices brown fast and can burn if the temperature spikes.
I add a splash of olive oil to a hot pan just before the breasts hit the surface. That oil helps create a crispy exterior and carries the flavor.
Pan Selection
I use a large skillet—Hexclad works great—to cook evenly and prevent sticking. A roomy pan keeps the breasts from crowding and shortens total cooking time.
- I sear each side roughly 5 minutes to reach the right internal temperature.
- Use a high-quality pan to avoid hot spots and ensure even browning.
- After removing the meat, sear the lemon in the skillet for 30 seconds to finish the dish with bright flavor.
Tips for Achieving the Ideal Internal Temperature

Temperature, not time, is my guide to perfect breasts every single time. I always use a meat thermometer to confirm the internal temperature reaches 165 degrees Fahrenheit at the thickest part.
Checking the temp is the only reliable way to make sure the chicken is safe to eat while staying juicy. If the surface looks browned but the internal temperature is low, I lower the heat to medium and finish the pieces gently.
I find a probe removes guesswork about cook time. Different thicknesses mean varied minutes in the skillet or pan, so the thermometer keeps the result consistent.
Once the meat reads 165°F, I take the pieces off the pan and let them rest for a few minutes. Resting preserves fat and moisture so each bite stays flavorful.
“Monitoring internal temperature gives a reliable, restaurant-quality finish every time.”
- I use medium-high heat to sear, then reduce if needed to reach the correct temperature.
- A thermometer ensures safe food and prevents overcooking.
- Rest the breast after cooking to lock in juices and flavor.
Serving Suggestions for a Complete Meal
Choose quick, nutritious sides so the meal comes together while the meat rests. A few well-picked accompaniments make this recipe feel like a full dinner without extra fuss.
Pairing with Healthy Sides
I love serving the breasts with green beans, cilantro-lime rice, or charro beans to balance flavors and textures. These sides add color and nutrition and finish in minutes while the meat rests.
- A squeeze of fresh lemon over the cooked breasts brightens the savory coating and cuts through the fat for a cleaner finish.
- Serve with green beans for a classic, low-effort side that pairs well with the seasoning and oil used in the pan.
- For drinks, I often choose a chilled white wine or homemade lemonade to refresh the palate.
I usually prepare the sides during the brief resting period so everything is hot and ready at once. Small choices make the difference between a simple plate and a restaurant-style meal my family enjoys.
“A bright squeeze of lemon ties the whole plate together.”
Storing and Reheating Leftovers
Leftovers can be the easiest part of meal planning when stored and reheated the right way. I store leftover chicken breasts in an airtight container in the refrigerator. It stays fresh and flavorful for 3 to 4 days after cooking.
I reheat slices gently in a skillet over low heat so the crust and surface stay textured. That takes just a few minutes and stops the meat from drying out.
Tip: After cooking, I squeeze a little lemon on the pieces and then cool before storing. The acid and fat help preserve flavor and brightness when you reheat.
I also deglaze the pan with a cup of water to loosen stuck bits and make cleanup simple. Leftover chicken is great sliced into salads, wrapped for lunches, or folded into a new dish for quick meals.
“Reheat slowly and keep leftovers airtight to enjoy nearly-fresh flavor all week.”
- Store in an airtight container to block fridge odors.
- Warm low and slow in a skillet or pan to keep texture.
- Check internal temperature before serving if you’re unsure.
Customizing Your Herb Crusted Chicken
A few simple additions make this skillet favorite your own. I like to tweak the coating to add heat, cheese, or fresh brightness in minutes.
If I want spice, I stir red pepper flakes or a pinch of chili powder into the spice mix. For a savory twist, I fold grated Parmesan into the crust for a rich, cheesy finish.
I sometimes cook the breasts on the grill for a smoky edge. The coating can thin a bit outdoors, but the flavor still holds up well.
- I swap extra garlic or fresh herbs to shift the flavor profile quickly.
- Adjust oil and salt to control how crisp and rich the crust becomes.
- Vary sides—roasted vegetables or cilantro-lime rice keep meals fresh.
- Try the texas roadhouse herb blend if you want a familiar copycat note.
“Small changes make this recipe endlessly adaptable and family-friendly.”
Conclusion
Turn weekday dinner into something special with a simple, reliable pan method. Recreating the herb crusted chicken from the texas roadhouse menu lets you enjoy a restaurant-style plate at home without the fuss.
This recipe yields tender skinless chicken breasts that cook in minutes and deliver solid protein for a budget-friendly meal. The bright finish of lemon lifts the savory crust and keeps each bite fresh.
Watch the internal temperature and rest the meat to lock in juices. Follow the steps here and you’ll master the art of a crisp, flavorful coating every time.
I hope you enjoy this copycat recipe as much as I do. Please share your twists or questions below—happy cooking and thanks for reading.