
Have you ever wondered if you can recreate that crunchy, satisfying fried favorite at home and skip the wait for a table?
I discovered that making texas roadhouse chicken critters in my own kitchen is the easiest way to enjoy a restaurant-quality dinner. I wanted the same crisp bite my family loved, so I experimented until the texture matched the original.
My kids were instantly obsessed with the crunch, and that pushed me to refine my technique. After several tries, I finally nailed the signature coating and flavor that make these roadhouse chicken critters a family favorite.
The result? A simple, crowd-pleasing recipe that brings the restaurant experience home without the wait. Below are the major points you’ll take away before we dive into the full method.
Key Takeaways
- Makes a restaurant-style dinner at home without waiting for a table.
- The secret is achieving a consistent, crunchy coating.
- My kids loved the texture, which guided recipe tweaks.
- The method is simple and repeatable for family meals.
- With practice, the flavor closely matches the original dish.
Why I Love Texas Roadhouse Chicken Critters
The main reason I keep making these is how easy they are to prepare and how much my kids enjoy them.
I make texas roadhouse chicken at home to skip long waits and still serve a restaurant-quality meal. The coating browns evenly, leaving a crunchy shell and a tender interior that everyone asks for seconds.
Some fans online noted menu shifts around 2018, but my homemade version aims to capture the original magic. I tweak the seasoning so the flavor matches what my family remembers.
The ease is a big plus. These chicken critters are quick to prep and fry. That makes them perfect for busy evenings when I want a sure crowd-pleaser.
- Restaurant-style texture: crisp outside, juicy inside.
- Customizable seasoning to suit my taste.
- Fast to make, ideal for family dinners.
Overall, making roadhouse chicken critters at home gives me control over flavor and timing while keeping dinner simple and fun for the kids.
The History and Evolution of the Dish
A closer look at the recipe’s past shows why the taste shifted after 2018. That year marked a clear turning point when many diners reported a drop in quality. Online forums filled with complaints that the modern plates often felt greasy or bland.
Insider notes helped me dig deeper. A former employee suggested the original used a pickle-juice and Louisiana hot sauce marinade. That tangy base, paired with a light, tempura-like batter, likely gave the original its crisp, lively flavor.
The Shift in Quality
The 2018 change in prep and sourcing seems to have altered texture and seasoning. Fans pointed out that updated methods left the breading heavier and oilier.
Recreating the Original Flavor
I spent a lot of time testing marinades and batter styles to recover that original bite. My aim was simple: a bright marinade, a thin, airy coating, and frying that produces a delicate crunch.
- The historic shift in 2018 changed preparation methods.
- Many diners turned to online communities to voice frustration.
- Research suggests a pickle-hotsauce marinade and tempura-style breading once defined the classic taste.
- I’m focused on perfecting homemade roadhouse chicken critters to match the original experience.
Essential Ingredients for Homemade Success
Good results start with quality ingredients and careful prep for each batch.
Protein: I use one pound of fresh chicken tenderloins or thinly sliced chicken breasts. That amount feeds a family and fries evenly.
Dry mix: The seasoned flour calls for one cup of all-purpose flour blended with salt, black pepper, and a teaspoon cayenne to add a gentle kick.
Spice note: I include cayenne pepper so the coating has that signature warmth without overwhelming the meat.
Frying oil: Always choose high-quality vegetable oil. It gives a neutral base so the breading crisps without extra flavors.
- One pound chicken tenderloins (or sliced chicken breasts) for even cooking.
- One cup flour plus spices for the perfect coating.
- One teaspoon cayenne pepper to lift the flavor.
- Plenty of vegetable oil for a steady, hot fry.
Proper prep of the tenders is the first step to a reliable critters recipe. Trim, pat dry, and time your dredging so each piece fries to a golden, juicy finish. This is the foundation for an authentic chicken critters recipe at home.
Preparing Your Chicken Tenderloins

Start by laying out each piece so every strip cooks evenly from edge to edge. I slice my meat into uniform pieces so the final fry is consistent. This small step saves a lot of time at the stove.
Uniform Slicing Techniques
Simple tips for even cuts
I always trim excess fat from the chicken tenderloins before slicing. Then I cut each into even strips so every piece finishes at the same moment.
If I’m short on time, pre-sliced chicken tenders work well. They keep size consistency and reduce prep without sacrificing texture.
- Slice chicken breasts into steady strips for even browning.
- Use a sharp knife to make clean cuts and avoid tearing the meat.
- Check thickness so no strips overcook while others finish.
When every tender is the same size, the coating browns uniformly and the inside stays juicy. This step is small, but it makes the end result look and taste like a pro version.
Mastering the Seasoned Flour Coating
To nail the coating I start by whisking spices into a dry cup of flour until the blend smells balanced.
I whisk one cup of flour with paprika, garlic powder, and a teaspoon cayenne to create a flavorful base. That seasoned mix is the backbone of the crust and gives the meat a savory lift during frying.
I beat an egg with milk to form the adhesive. The egg and milk mixture helps the seasoned flour cling, so each piece picks up an even layer before it hits the oil.
I press each piece of chicken firmly into the flour, which compacts the coating and builds that signature crunch. For a double layer, I keep a second cup of flour ready for final dredging so I never run out of coating.
- Whisk spices into one cup for a balanced base.
- Use egg and milk as the main binder.
- Press pieces into the mix, then dredge in a second cup.
Achieving the Perfect Golden Brown Fry

A steady oil temperature makes the difference between a limp finish and crisp, golden brown strips. I rely on a quick flour-sizzle test and a thermometer to keep things consistent.
Maintaining Oil Temperature
I heat vegetable oil in a large skillet over medium-high heat until a pinch of flour sizzles on contact. That small test tells me the oil reached the right heat before I add the first cup of coated strips.
Using a thermometer helps me hold steady at medium-high heat so the batter fries golden without soaking up excess oil.
Draining Excess Oil
Once the chicken pieces are fried golden, I move them to a plate lined with paper towels to drain excess oil.
I let each batch rest briefly, then transfer to a fresh towel if needed to fully drain excess. A light sprinkle of sea salt while warm boosts flavor.
Testing for Doneness
I fry strips for about 3–4 minutes per side and check thickness to ensure the meat is cooked. Proper timing means the outside is fried golden and the inside stays juicy.
If in doubt, a quick internal check or cutting one piece confirms doneness and prevents overcooking.
- Heat test: flour sprinkle
- Fry time: 3–4 minutes per side
- Finish: rest on paper towels and season with sea salt
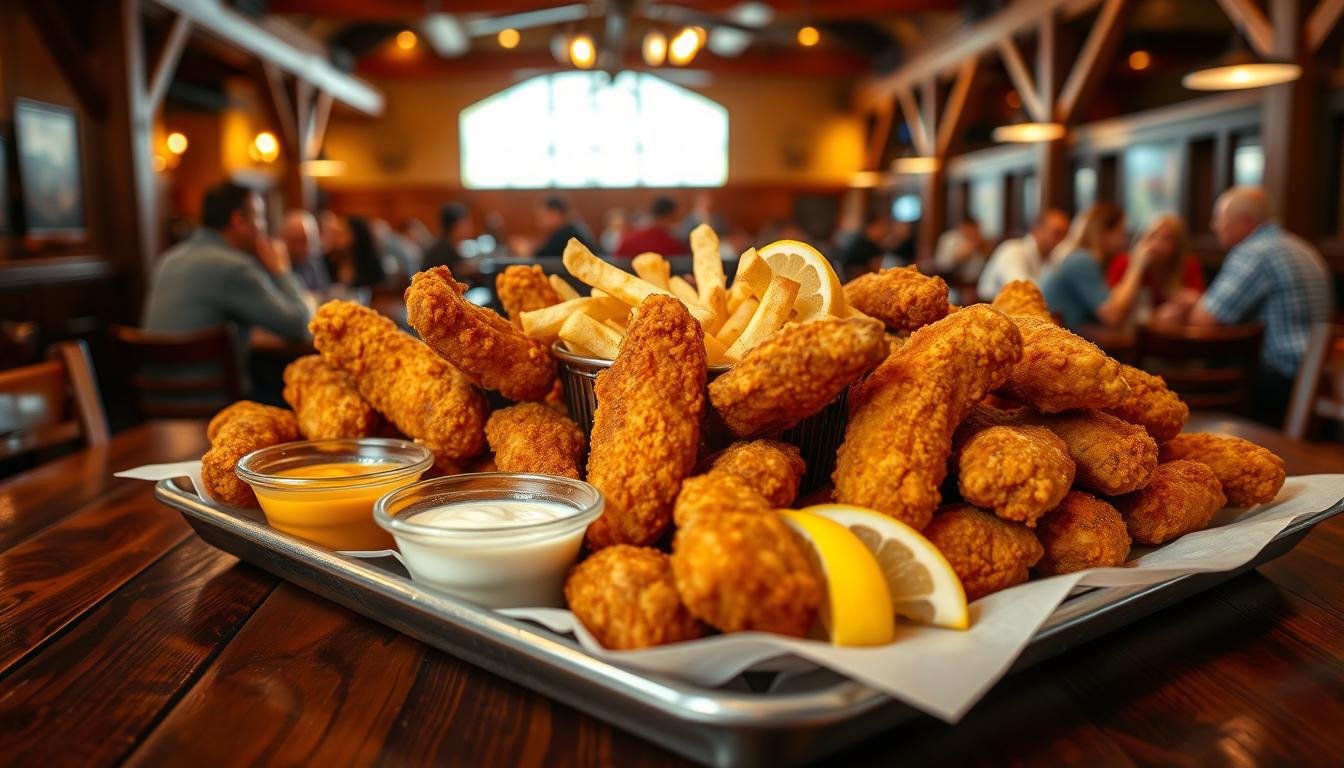
How to Serve Texas Roadhouse Chicken Critters
When it’s time to plate, I focus on heat and timing to keep every bite crisp. I let the final batch rest only briefly so the coating stays crunchy and the meat inside stays juicy.
Keep everything warm. I set warmed plates and hold side dishes in a low oven. That way, salads stay cool while mashed potatoes and veggies stay hot when the strips hit the table.
I always offer a variety of dipping sauces so each guest can pick their favorite. A tangy ranch, a sweet mustard, and a spicy BBQ cover most tastes.
“Serve the platter family-style to encourage sharing and conversation.”
- Arrange the roadhouse chicken on a large platter for impact.
- Serve the sauces in small bowls so guests can customize each bite.
- Keep sides warm until the moment you serve to preserve texture.
My goal is to recreate that casual, welcoming restaurant feel at home. Simple presentation, warm sides, and hot strips make the meal feel like a night out—without leaving the house.
Best Dipping Sauces for Your Meal

Offering a trio of dipping options turns a simple meal into a mini tasting event at my table.
My go-to lineup always includes honey mustard and a smoky bbq sauce. Honey mustard is the family favorite and pairs well with the crisp coating.
I make a simple homemade bbq sauce to add depth. A mix of tomato, apple cider vinegar, molasses, and smoked paprika gives it a rich, balanced taste.
A tangy sauce like ranch or a vinegar-based dip cuts through the richness. This keeps each bite bright and prevents the meal from feeling heavy.
Choice matters: put several sauces on the table so everyone can customize their plate. It makes the dinner feel more casual and fun.
“A small selection of sauces lets guests mix and match and keeps the flavors interesting.”
- Honey mustard for sweet-tangy balance.
- Homemade bbq sauce for smoky depth.
- Tangy ranch or vinegar-based sauce to cut richness.
Ideal Side Pairings for a Complete Dinner
A few well-chosen sides turn a plate of fried strips into a full, comforting meal. I like to build a simple lineup that balances crunch, creaminess, and fresh greens.
Creamy mashed potatoes are my go-to comfort side. They pair perfectly with texas roadhouse chicken because the soft texture offsets the crisp coating.
A crisp garden salad brings bright contrast to the table. I toss mixed greens with a light vinaigrette so the salad stays refreshing and cuts through the richness of the fried food.
I often set out both mashed potatoes and a salad. My family requests mashed potatoes most nights, and the salad keeps the dinner balanced and satisfying.
- Mashed potatoes provide warmth and comfort next to the fried main.
- A fresh salad adds crunch and acidity to lighten the plate.
- Choosing the right side dishes turns simple food into a hearty, complete dinner.
Storage and Reheating Tips

For leftovers that taste fresh, I use a quick flash-freeze step before bagging. I lay each chicken tenders on a baking sheet in a single layer and pop them in the freezer for about an hour. This prevents pieces from sticking together so I can grab just what I need later.
When it’s reheating time, I place the strips on a baking sheet and warm them in a preheated oven. That method helps restore the original crisp texture without sogginess.
I store leftovers in an airtight container for up to 3 days. That way I have a fast meal on hand and can remember later to reheat without fuss.
An air fryer works great too. Reheating in an air fryer brings back crunch without needing an extra cup of oil, and it saves time on busy nights.
- Flash-freeze on a baking sheet to keep pieces separate.
- Reheat on a baking sheet in the oven to regain crispness.
- Store in an airtight container up to 3 days so you can remember later to enjoy leftovers.
“Taking the time to store the tenders properly makes it much easier to enjoy a delicious meal when I’m busy.”
Exploring Variations and Dietary Swaps
Small swaps in the batter and cooking method open up many tasty options. I use easy adjustments to suit preferences while keeping the core crisp bite intact.
Healthier cooking: For a lighter meal, I bake the chicken at 400°F for 20–25 minutes. An air fryer works too—set it to 375°F and cook about 12–15 minutes for a golden finish.
I also play with flavor and dietary swaps so everyone can enjoy the plate.
- I tweak the sauce by adding a dash of hot sauce to the flour mix for spicier meat.
- For a gluten-free choice, I replace regular flour with a gluten-free blend; the coating stays crispy after about 15 minutes of cooking.
- Adapting to an air fryer usually takes 12–15 minutes and gives a great golden result with less oil.
- Baking at 400°F for 20–25 minutes cuts oil use while keeping texture pleasant.
These swaps let me serve varied plates quickly and tailor the meal to each guest’s needs.
Conclusion
Nailing the coating and timing turned a takeout craving into a reliable home meal.
Mastering the texas roadhouse method at home has been rewarding. By following the steps here, I save time and serve a satisfying plate that echoes the original roadhouse chicken critters.
I hope this guide helps you recreate the perfect chicken critters recipe, complete with your favorite dipping sauces and side pairings. Whether I cook for kids or host friends, these critters are always a hit.
Keep practicing small tweaks to seasoning, oil temperature, and dredging. With a little repetition, your critters recipe will improve each time you make it.